Table of Contents
Page 1: Photographing Fireworks - Part 1 Page 2: Putting it all together in PhotoshopFirework Photography Part 2
Putting it all together in Photoshop
|
Layers
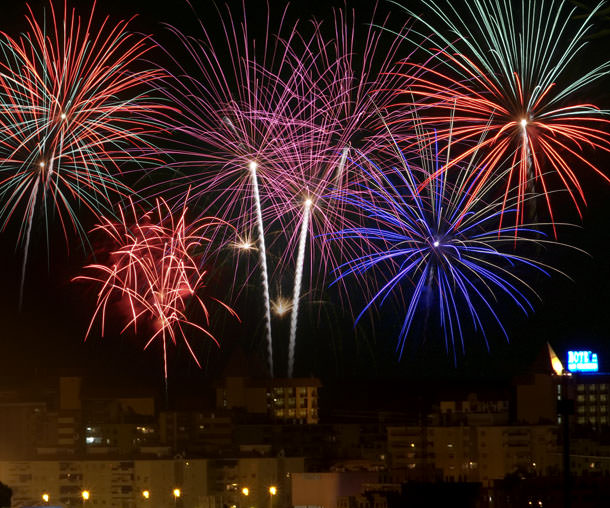
The firework photo above is made up of six different pictures. It would hardly qualify as the most realistic picture of the year but it is quite colorful and exciting, and it portrays a good impression of a firework display. The background of the picture is the photo of the buildings (I had to extend the sky a little using the 'canvas size' tool to make a bit more room for the fireworks.
The fireworks were then added one by one by simply dragging the photo into the widow of the background picture. This creates a new layer on top of the existing layer. At this stage you can't see the background layer at all. However if you change the layer mode from 'normal' to 'lighten' the background reappears.
Here you can see the layers palette for this picture layer 3 is selected which contains the blue firework and you can see at the top of the palette the layer blending mode is set to 'lighten'. This means that only the parts of the image that are lighter that the layer(s) below will show. For the purpose of our subject this is ideal as the background of each image disappears.
If, as in the case of three of our layers, further control is needed, we can apply a layer mask. These are represented by the white rectangles that you can see on layers 1, 2 and 3. The black blobs represent parts of the image that have been blocked by painting black onto the layer mask. The great thing about layer masks is that by using soft edge brushes and or different opacities you have a very fine degree of control over what shows and what is masked. Also, by using white instead of black you can reverse the effect entirely or partially. As you can see on layer three I have used the mask to tone down the ends of the white trails at the bottom of the firework to try to blend them into the background a little better.
The ability to stack layers on top of each other is one of the best things about Photoshop. It becomes so easy to put together different elements as in this case or make adjustments to the color or contrast, using adjustment layers, that are completely reversible and adjustable and never need to become irreversible. For someone like me who can never make up their mind, that's wonderful!
Using the move tool while selecting a layer enables you to move each element anywhere in the frame, so you can have hours of fun getting the positioning just right. Also on the 'transform' menu which is one of the choices under edit you have the chance to re-size each element, rotate them or distort them in other interesting ways. I have done a fair amount of re-sizing in this picture.
Hue & Saturation
Another tool that I made extensive use of in this picture is 'Hue & Saturation'. This can be found under the 'Image' -> 'Adjustments' menu.
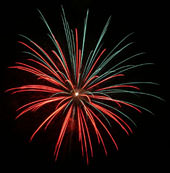
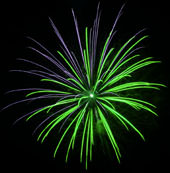
There are various ways of changing color in Photoshop, some are very subtle and are used for color correction, but when we need a completely different color the 'hue' slider is the one to use. The two pictures on the left are both from the same photograph, the one at the top is the original photo and the one at the bottom is the altered version. Not all hues will work well, you need to select the color quite carefully bearing in mind that fireworks are usually bold prime colors. This one works quite well in blue as well and I used a blue version in the picture at the top of the page.
To further disguise that this is the same object I have reversed the image horizontally and rotated it a little. I tried flipping it vertically but it definitely looked upside down so I abandoned that one.
Lastly I also made extensive use of the 'curves' tool to try to balance the elements and get them to blend together. You can apply a separate curve adjustment to each layer and, as I mentioned above, but did not do on this occasion for the sake of simplicity, you can save the 'curves' adjustment as a separate layer. See my tutorial on contrast for more details on curves.
A few tips for the budding wildlife photographer.
Lighting and perspective.
What you need and what to watch out for.
For perfectionists.
All the settings you need.
Photograph flowers like a professional, what you need to know.
For when you need extra depth of field.
How to get those ultra close-ups in focus.
Shooting a panned sequence of shots and stitching them together to make a panorama.
Techniques to help you capture those golden moments.
Getting the exposure right in all that white.
Tips on how to capture fast action.
Take better holiday photos without losing your sanity.
A complete 'how to' for weddings, with an accent on crowd control.
Bribing people to sit for you.
If you enjoyed this page you might
be interested in my eBook
Learn Photography with Geoff Lawrence